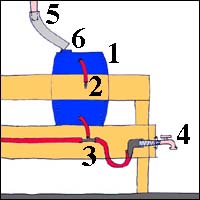
See details at right and below, keyed into the numbers shown here.

<--previous | 1 | 2 | 3 | 4 |
See details at right and below, keyed into the numbers shown here.
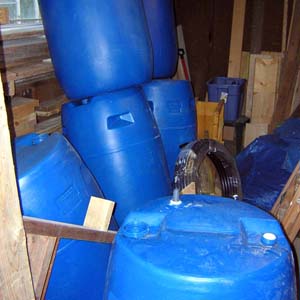
Det.1: Rain barrels are assembled in garage.
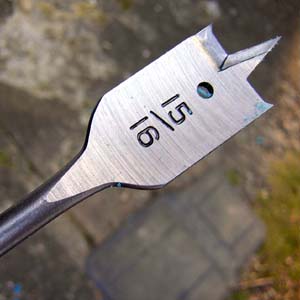
I use a 15/16" bit to cut two holes in each barrel.
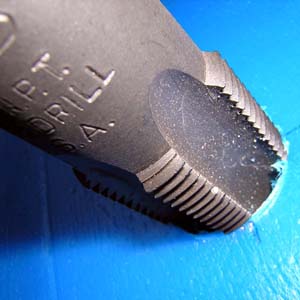
A 3/4-14 NPT tap threads the hole.
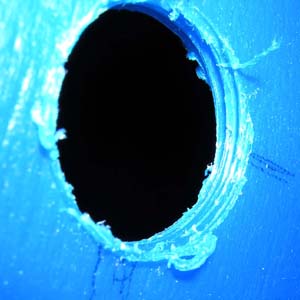
The hole is ready for the fitting.
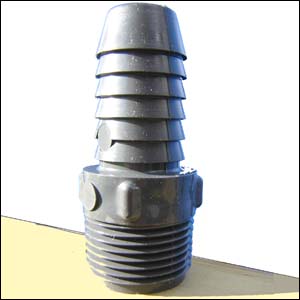
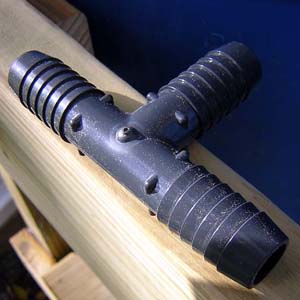
I use a standard 3/4" plastic fitting.

The fitting can be inserted using Teflon tape or joint compound.
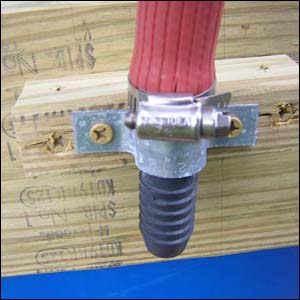
Det.2: Before screwing into top of barrel, I attach 3/4" hose with hose clamp. Note that typical garden hose is 1/2" or 5/8" diameter (too small for fittings), but 3/4" hose is available.
The overflow hose at the top of the barrel is then fastened to the wood frame, but not yet connected to the storm sewer (street).
Det.3: I use a T-fitting at the bottom hole in order to connect all five barrels in series.
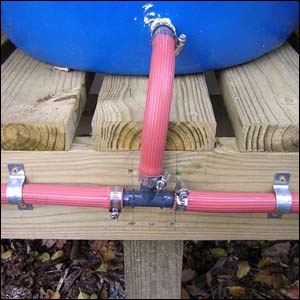
The hoses are attached with pipe clamps; then screwed into the barrel.
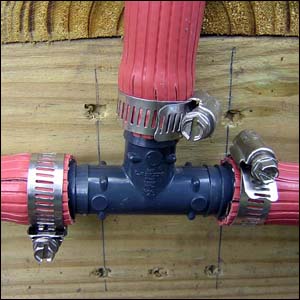
Detail shows the stainless steel pipe clamps.
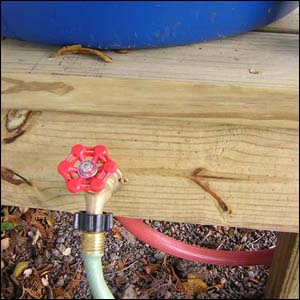
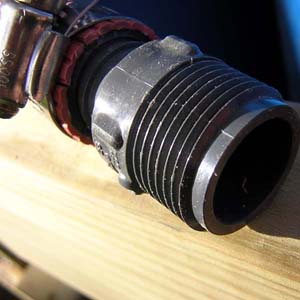
Det.4: The hoses from the bottom of the barrels are connected at each end to a faucet.
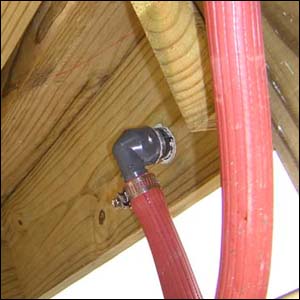
The faucet is connected to the hose using a 3/4" steel nipple connected to the plastic fitting shown above.
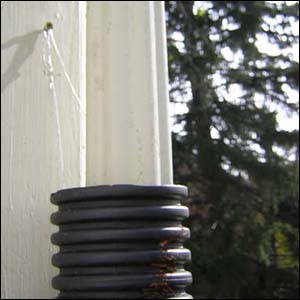
Det.5: The old downspouts are cut to the proper height, then fastened to the wall of the house using galvanized wire as shown. A flexible drainage pipe connects the downspout to the barrels.
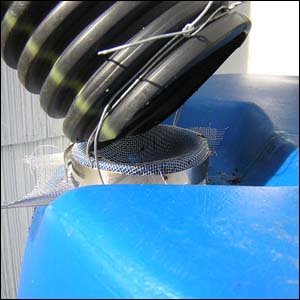
Det.6: The existing 3" hole in the barrel is screened, using a hose clamp, which also holds a wire tie around the flexible pipe.
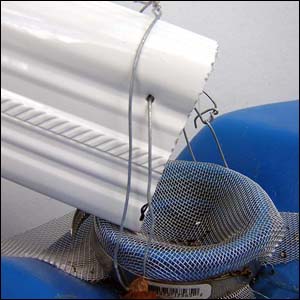
For the newer rectangular downspouts, flexible pipe is not needed.
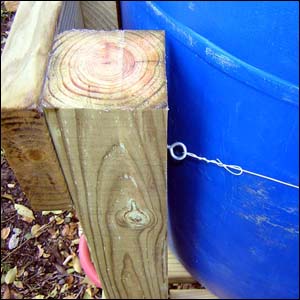
Finally, the barrel is tied to the wood frame with galvanized wire.
<--previous | 1 | 2 | 3 | 4 |
last updated: 12 November 2006
© 2004 J. Ochshorn. All rights reserved. Republishing material on this web site, whether in print or on another web site, in whole or in part, is not permitted without advance permission of the author.